Once your OpenSports group is set up, you are ready to create and share your group events. This guide will show you how to create an event on the OpenSports website and app.
Event Setup
- From your group home page, click on Add Event. You can also click the Create an Event button next to your profile picture in the right upper corner.
- Select the sport or fitness activity for your event from the dropdown menu.
- You can enter a custom sport if your activity is not listed in the dropdown menu.
- A header photo will automatically be loaded based on the sport you select (stock photo). To update the event photo, hover over the right upper corner of the photo and click Upload Event Image.
- Select the skill level for your attendees or enter a custom level by typing in the text field.
- Select the gender for event attendees.
- Select the event type — public, private, or secret. Learn more about event types here.
- Add new or select existing event tags. These tags are displayed publicly on the event page and can be used to set up discounts and memberships.
Event Info
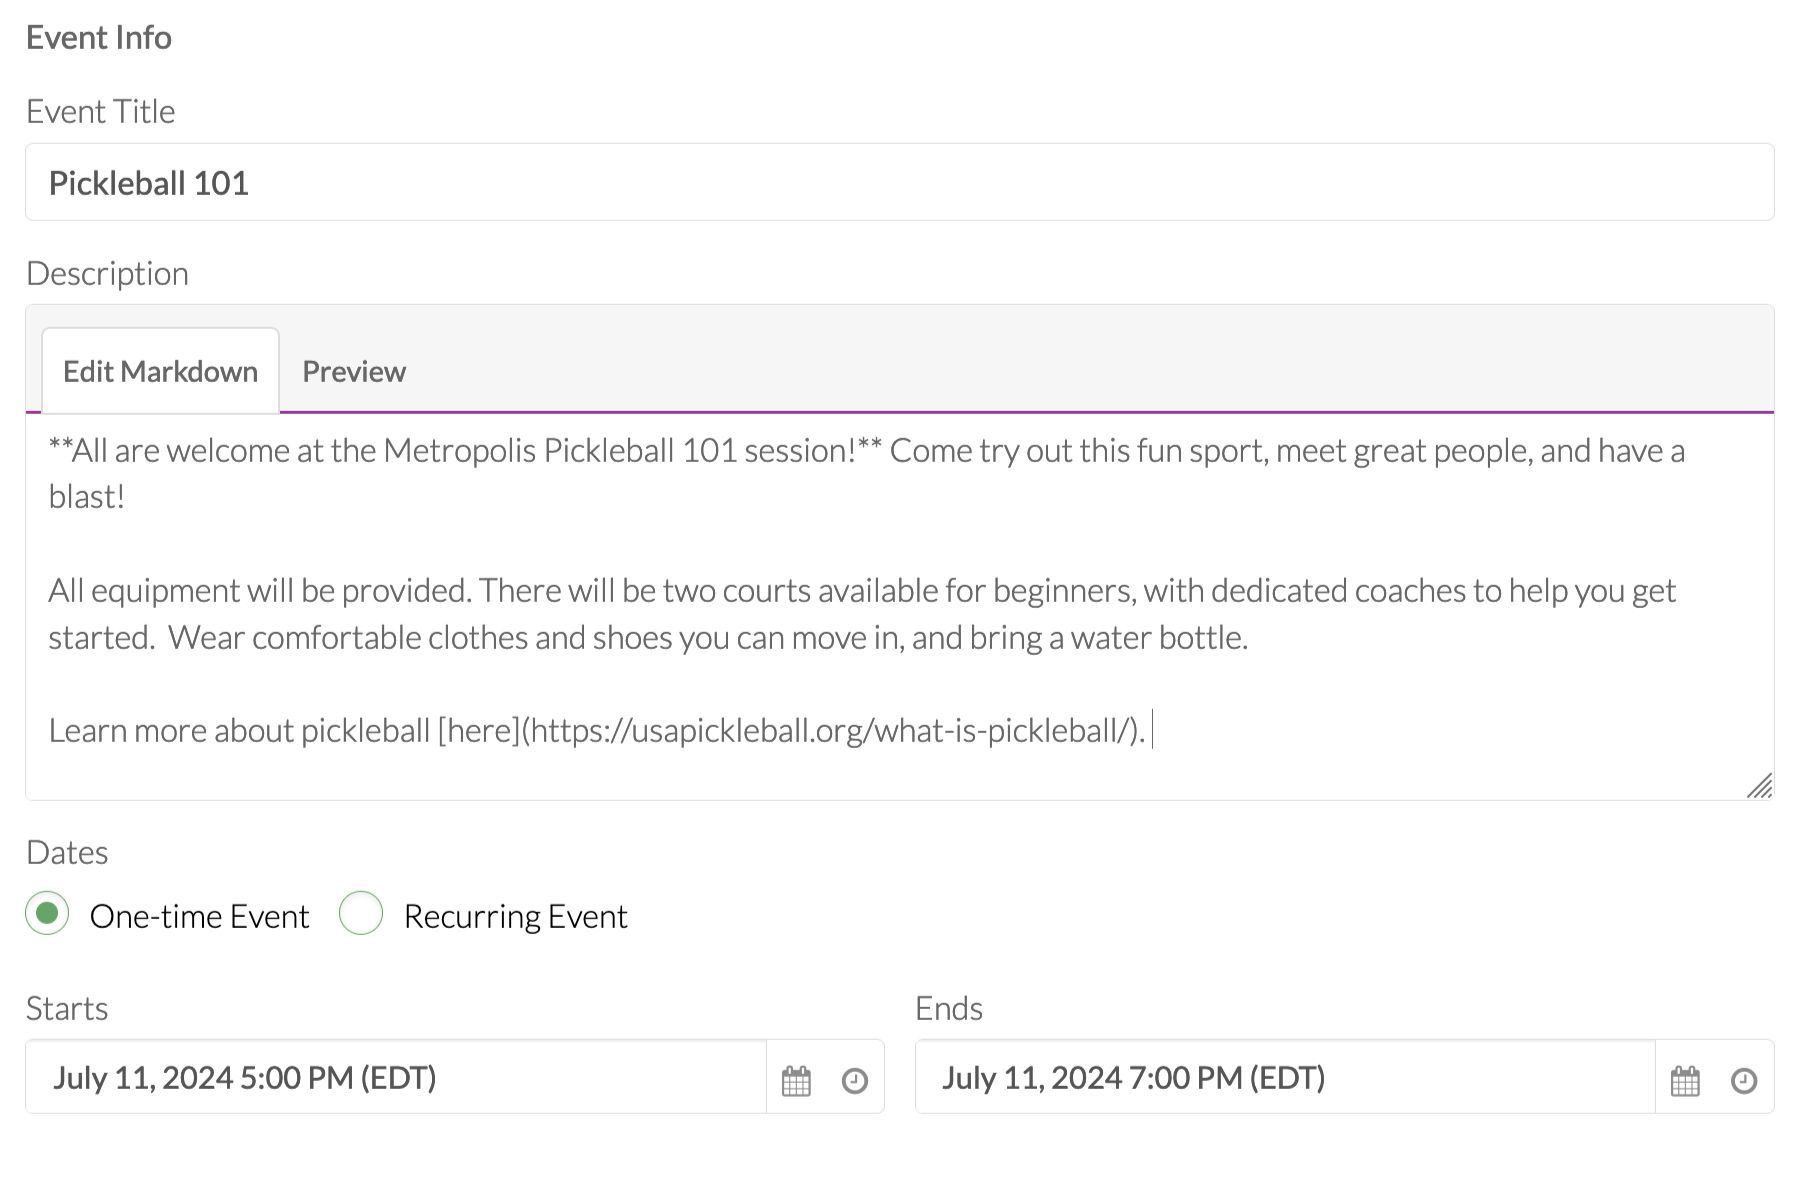
- Enter the event title and description:
- This section is markdown enabled! Here is a Markdown cheat-sheet to help you get started.
- You can see how attendees will see the event description in the Preview tab.
- Select the one-time or recurring event option.
- Select your event date(s) and start/end times.
How to set up recurring events
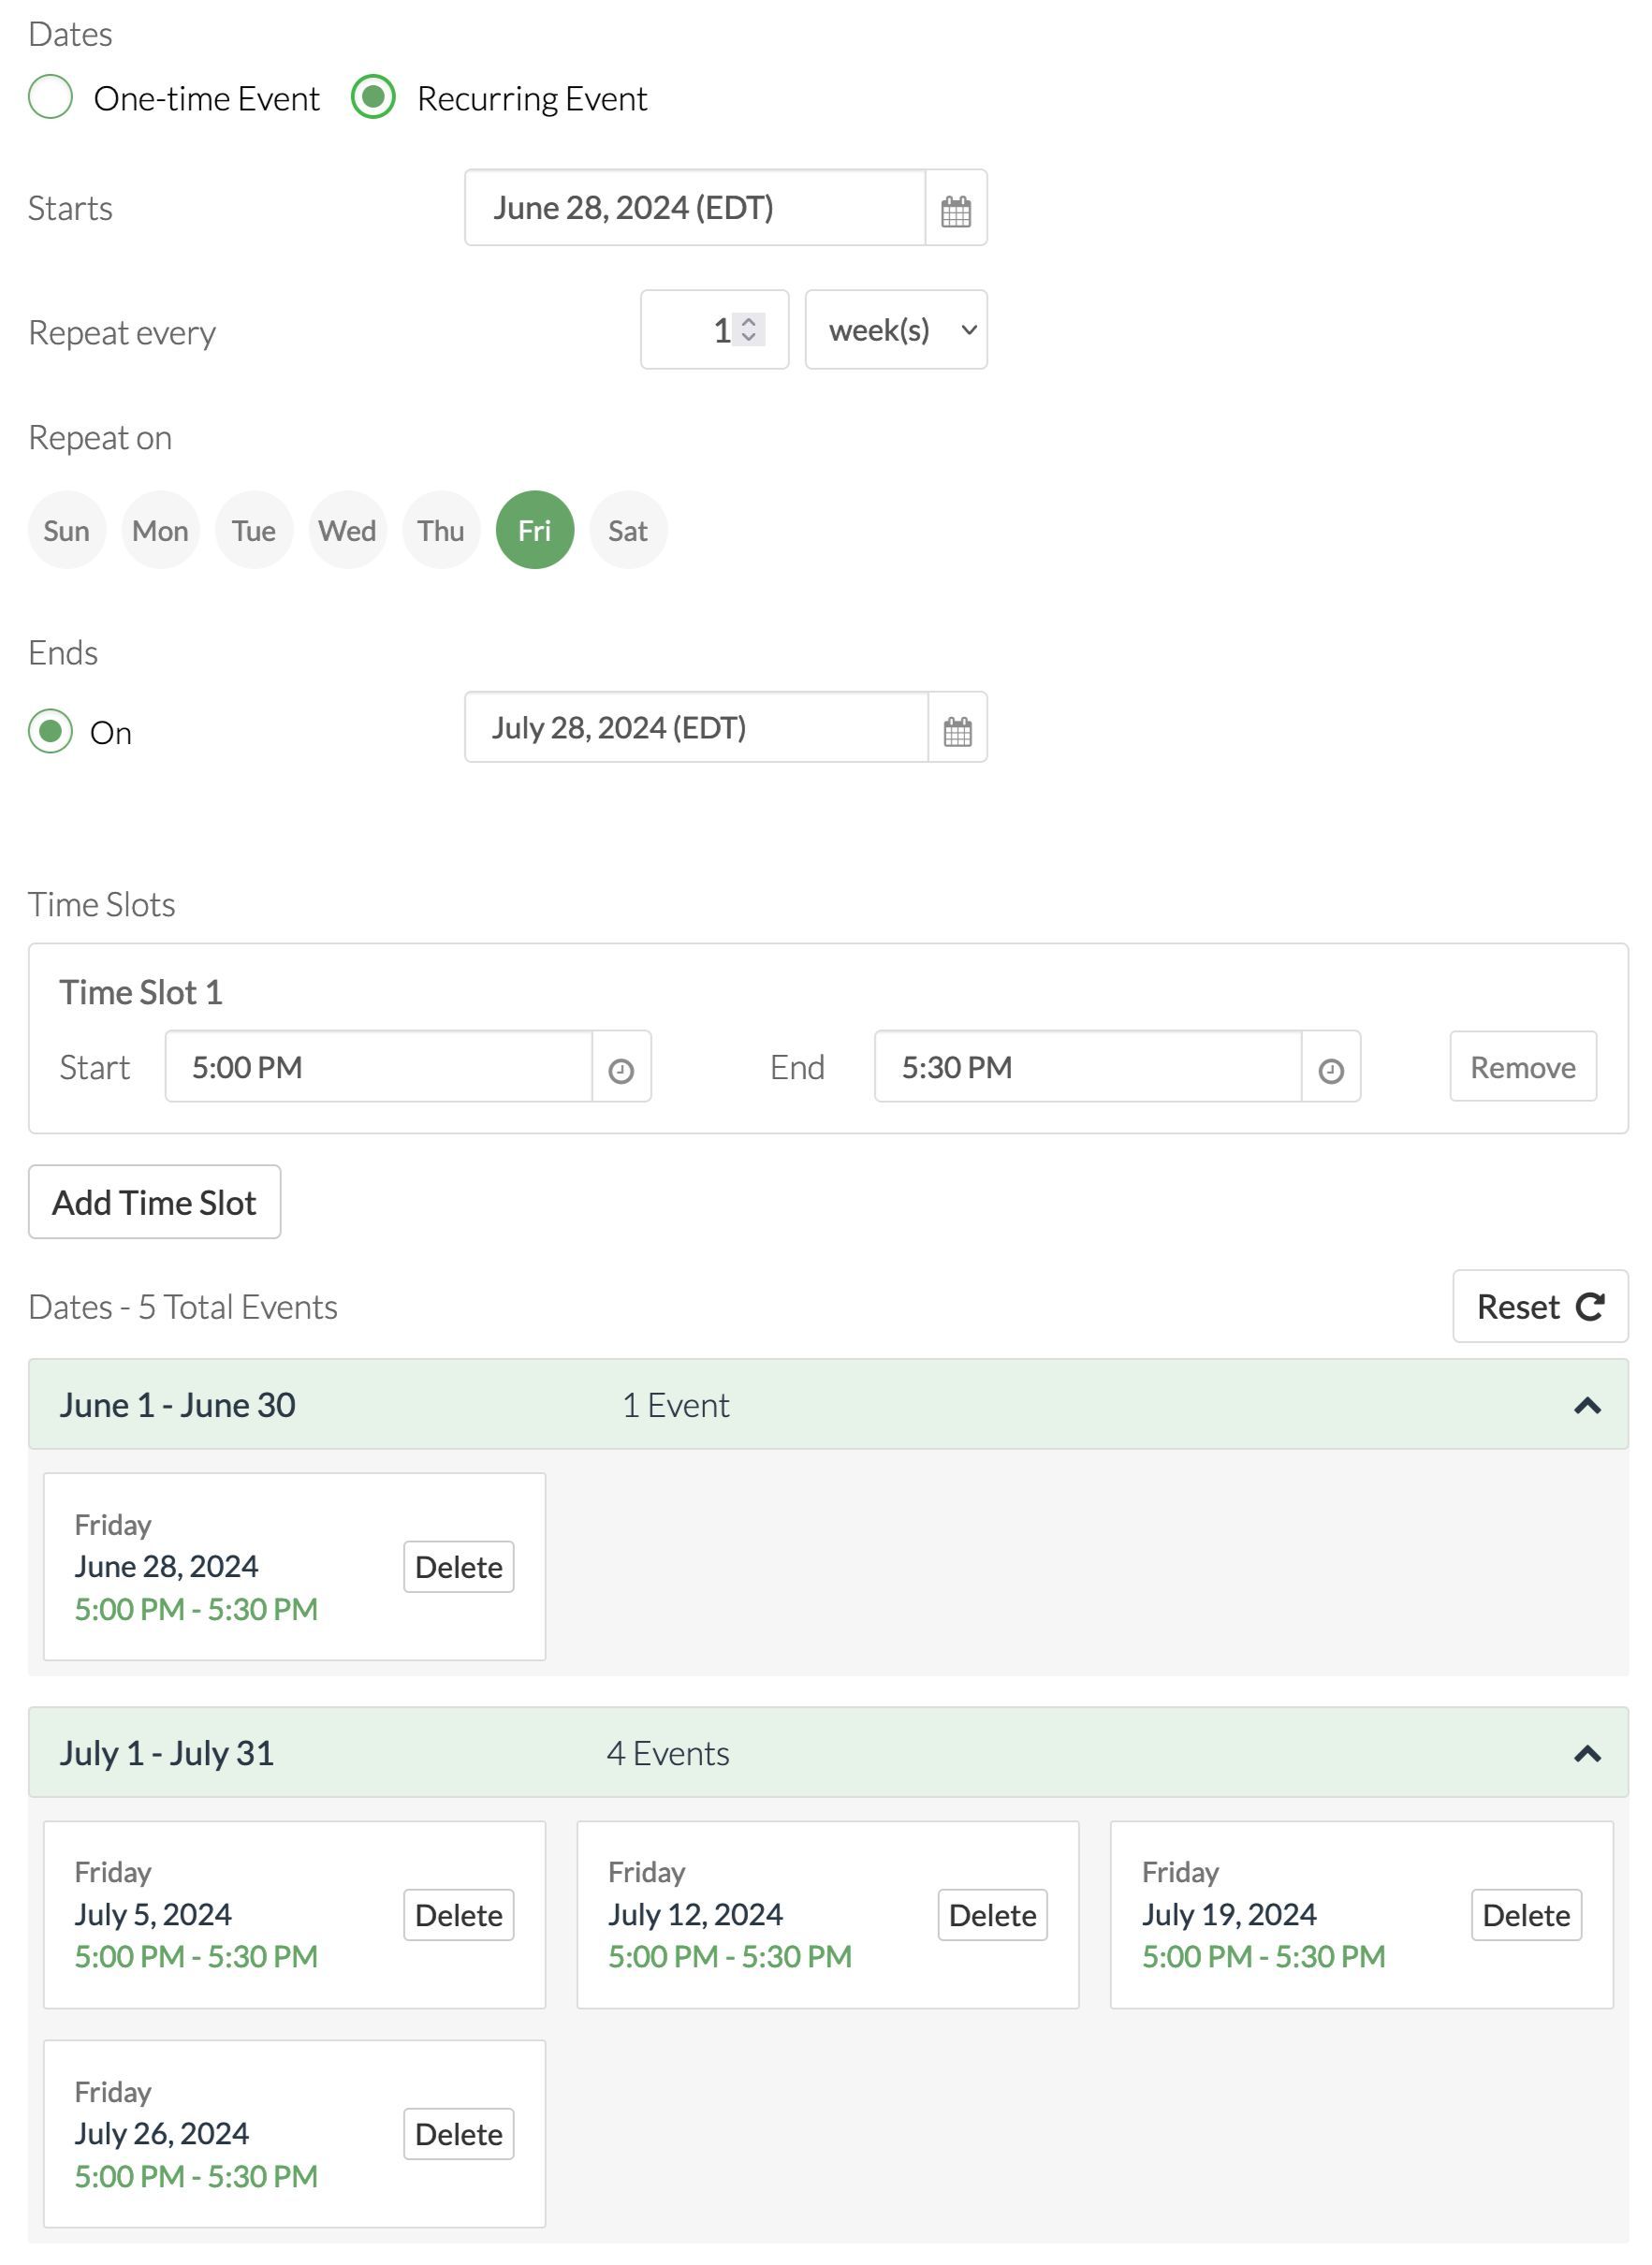
When selecting the Recurring Event option, you will see additional details to fill out.
- Enter your event start and end dates, how often the event will repeat (e.g., weekly events → repeat every 1 week, monthly events → repeat every 4 weeks), and what day(s) of the week the event(s) occur.
- Select the time slot for your recurring event. By default, only one time slot is created.
- To add additional time slots, click on Add Time Slot. Each time slot will create a separate event. For example, if you select two time slots for a recurring weekly event, there will be two events created each week, one per time slot.
- There must be at least one time slot for an event.
- Review the recurring event schedule that is auto-created.
- You can view all scheduled events per month. Click on the month banner to collapse or expand each month's events.
- You can delete individual events within your schedule, as needed (for example, if an event falls on a holiday). The rest of your schedule will remain the same.
- To undo any changes you made to the auto-created schedule, click Reset.
Event Location
- Enter the event location by typing the address into the search bar. This event location will not be saved to your group facilities for future use.
- To use an existing facility, click on Select from Group Facilities. Learn how to add facilities to your group here.
- To hide the specific resource(s) where the event will take place, make sure the Display Resources Publicly box is unchecked. Attendees will still be able to see the event facility.
- You can also create new facilities during the event setup process.
Specify Registration Options
You can allow users to register for events as individuals or teams, as well as specify the number of guests an attendee can bring (guests are individuals who do not have an OpenSports account).
- Select if users register by Position (i.e., as individuals) or by Team.
- Setting up registrations by Teams allows users to register under a specific team ahead of event day.
- Add as many registration types (positions or teams) as needed.
- Edit the type of registrations offered:
- Click the Edit button in the Position or Team card.
- Add a custom name (e.g., Forward, Goalie), number of available spots, and price.
- Different registration types can have different prices, as needed.
- When setting up registrations for Teams, the price you enter is the price per individual.
- Select the number of guests per user - this specifies how many guests (i.e., individuals without an OpenSports account) an event attendee can bring. The user will pay for all guest registrations under their name, but any guests will not be prompted to sign the group waiver and you will not have their individual information (name, contact information).
- Guests per user can range from none to unlimited.
- Choose if you want to hide the list of users who registered for the event from the attendees.
- If the Hide Attendees box is checked, only group admins, event admins, and event managers will be able to see the list of attendees.
- In order to Hide the number of spots from users, make sure both the Hide Attendees and the Hide the number of sports boxes are checked.
Enter Custom Questions
Add new or re-use existing questions to collect custom information from event attendees. Check out the full guide to editing and managing custom questions here.
Set up Refund Deadlines
If you collect payments through OpenSports, you can set up a refund deadline for your events to issue automatic refunds. You cannot edit the refund policy after the event is created.
Check out the full guide to sending refunds here.
Chat Access
Select the event chat access settings:
- Disbaled: no event chat functionality exists
- Public: any OpenSports user can use the event chat
- Attendees: only users who register for the event can access the event chat
- Attendees and waitlisted users: only users who register for the event or join the waitlist can access the event chat
All admin types (group admins, event admins, event managers, and event assistants) are able to access the event chat (unless it is disabled). You will not be able to change the chat settings after your event is live.
Staff Assignments
You can assign event-specific staff positions to any group member who is assigned the Event Assistant admin role (or a role with higher permissions; learn about admin roles here. Read more about staff positions here.
- Before you can assign a Staff Position, you have to create the specific position:
- Through the event creation page, click on Create Staff Position and enter the staff position title.
- Through the group Dashboard, click on Settings → Staff Positions.
- Select whether you want the staff position to be public or private:
- Public staff positions are visible to all users registered for the event and can be messaged through the event chat.
- Private staff positions are only visible to users with admin roles.
- Assign a mandatory Primary Organizer for your event (you can use the default Event Host staff position for this user).
- Select automatic staff discount, if applicable.
- OpenSports provides built-in free registrations for event staff +/- their guests. Select the type of discount, if any, from the dropdown menu.
Finalizing Event Details
When you have completed all required event creation fields, review your event information and click Save. Your event is now live on your group page!
Ready to get started?
Congrats on setting up your event!
- Share your event and invite OpenSports users
- Learn about our automatic waitlist
- How to check-in event attendees
Questions? Send them our way: support@opensports.net